How to Install
Our blinds are very easy to install (click here for a Customer Story, including photos and videos on how to install your blinds). Alternatively one of our install partners can install your blind for you. Note that additional costs will apply. Please contact us directly by live chat, phone or email for more information.
What you will need to install your blind is a drill, appropriate drill bit, phillips head screwdriver, level and pencil. What you will receive from us (besides the blind of course) is a pin-end bracket, a control-end bracket, a child safety device, 4 x screws, 4 x plasterboard anchors for when you are attaching your blind to plasterboard and 4 x masonry plugs for when you are attaching your blind to brick/concrete etc.
Before you install your blind, make sure you know which drill bit is required for your surface (plasterboard, timber or masonry).
Make sure you have clean hands and wipe down any surface area that is going to come in contact with the blind (our install partners use plastic disposable gloves). Blind fabric is susceptible to marking from dirt, dust and oils so please be careful when you install your blind.
Finally it's important to note that you should not install your blind on a surface with water damage, rotting or any other damage.
Step 1:
Unpack your order and lay it out in front of the window where the blind is being installed.
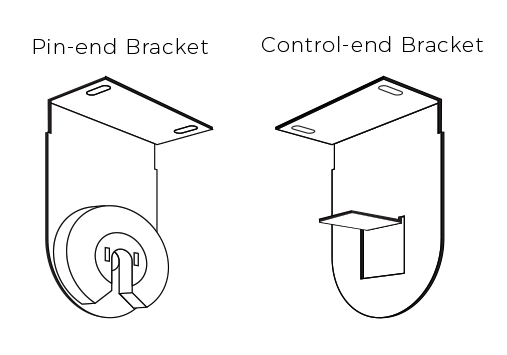
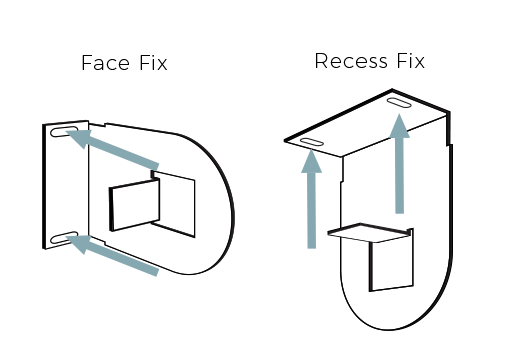
You should have two different brackets, a pin-end bracket and a control-end bracket. The control-end bracket must be on the side that you want the chain control. The brackets will fix your blind to the face of the window (face fitting) or the top of the window recess (recess fitting), depending on what you selected when you placed your order.
Step 2:
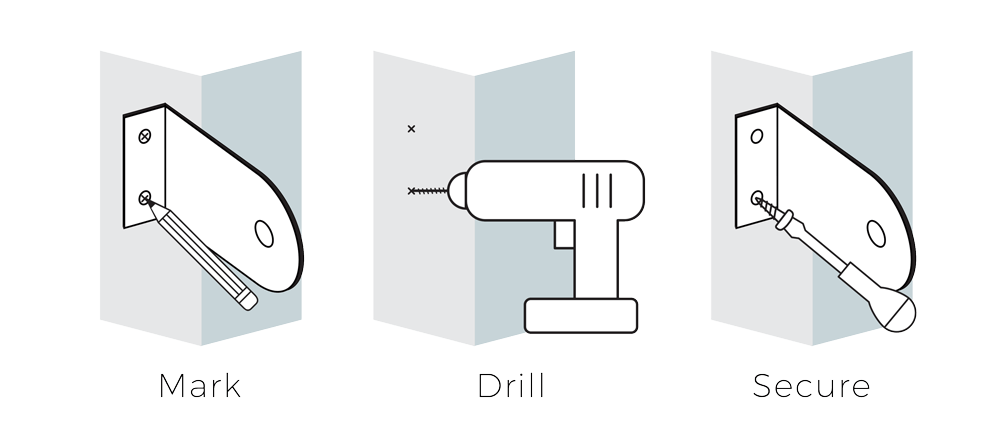
Mark where your pilot holes will be by placing the bracket against the wall where you want it to go and use a pencil to mark where you will be inserting the screws. Drill pilot holes for timber screws or appropriate sized holes for your plasterboard anchors or masonry plugs. If you are using anchors or plugs, once you have drilled appropriate size holes you will need to gently tap them into the plasterboard or concrete/brick first. Screw the bracket into place. Complete the process for both sides.
PLEASE NOTE: the brackets must be level. Use a level to confirm when you mark your pilot holes, and again after you screw the brackets into place.
Step 3:
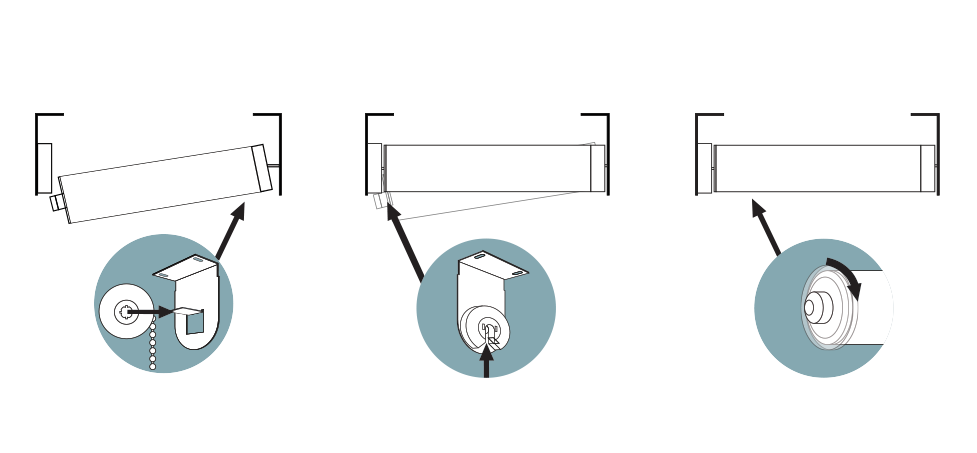
Once the brackets have been screwed into place, locate the control end of the blind (the end with the chain control) and insert it into the control-end bracket. Position the blind so that the chain hangs freely and will not rub on the chain cover when you raise and lower your blind. Turn the plastic cover on the pin end of the blind anti-clockwise to retract the pin, slot the pin into the notch on the pin end bracket, and then turn the plastic cover clockwise to extend the pin and lock the blind in place.
PLEASE NOTE: ensure that the blind is rolled up when fitting the blind into the brackets.
Step 4:
PLEASE READ THE FOLLOWING POINT REGARDING CHILD SAFETY:
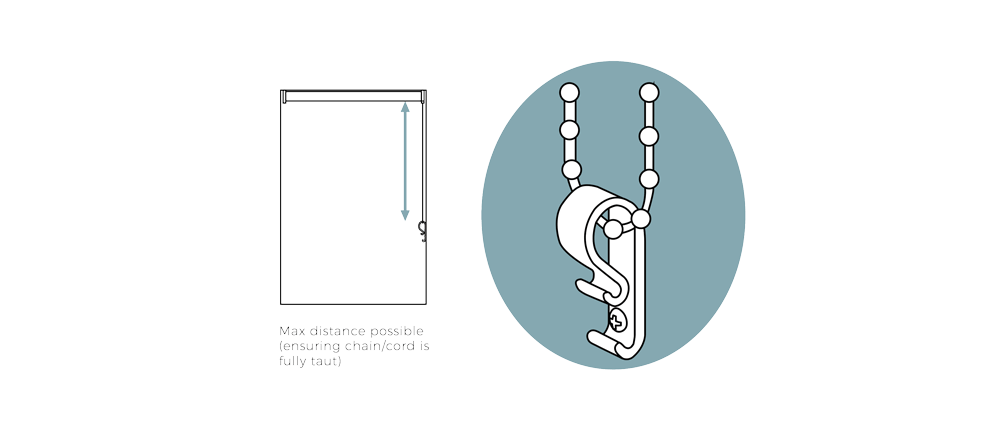
All blinds include a child safety device which must be used. In Australia this is required by law.
When attaching the chain safety device, allow the chain to drop to its natural height and screw the child safety device to the wall or frame under a small amount of tension. It is important that once fixed the chain is reasonably taut.
For more information visit the ACCC’s webpage on the installation of corded internal window coverings.
Step 5:
Test the blind by lowering and raising it a couple of times.
Congratulations, you have successfully installed your blind!